Type K Diopter Sight manual
Translated from French 


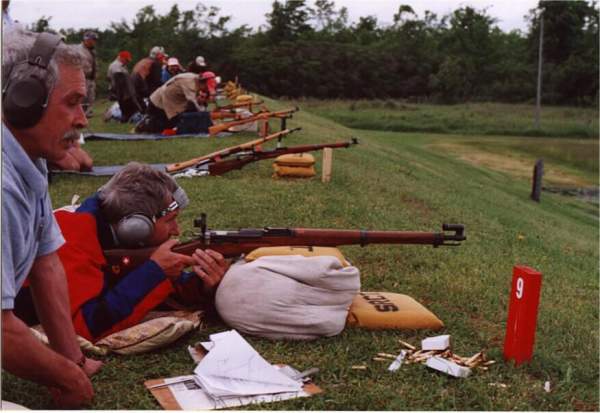
Swiss Diopters on the firing line
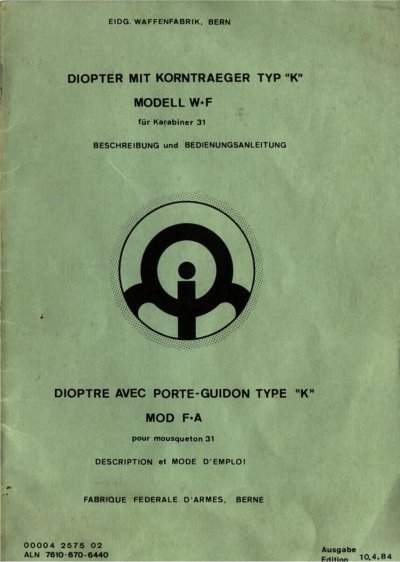


Front Cover

Contents                                                                            Page
Description                                                                          2-3
Characteristics Techniques                                                   2-3
Front Sight Installation                                                         4-5
Rear Sight Installation                                                          6-7
Adjusting the Line of Sight                                                   8-9
Aiming                                                                                  10
Parts List (not translated)                                                  11-15


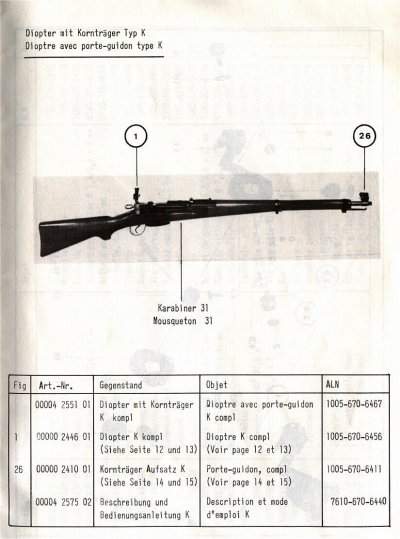
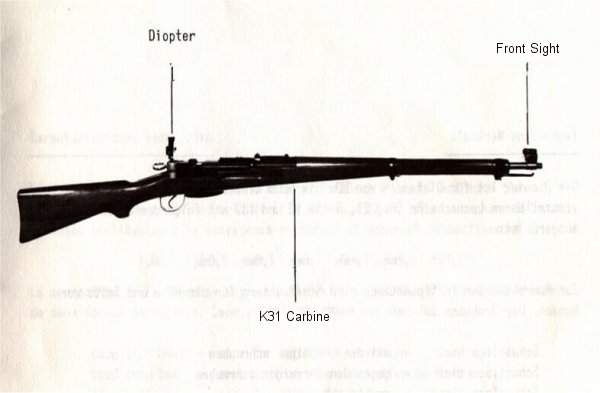
Description; The type K diopter plus front sight is a aiming system that can be mounted on any K31 without any modification to the weapon.

Technical characteristics;
The diopter is adjustable for distances of 50m to 600m. It comes with an eyepiece with a perforated disc that has six sighting holes for the convenience of the shooter and measuring, respectively; 1,0mm, 1,2mm, 1,4mm, 1,6mm, 1,8mm, 2,0mm.

Windage and elevation adjustments are made with two adjustment screws. The elevation screw should be adjusted in the following manner;

shot too high-turn elevation screw clockwise
shot too low - " " " counter-clockwise

windage adjustment;
shot to left- turn adjuster to the right
shot to right- turn adjuster to the left

The adjustment screws for both elevation and windage are furnished with click stop graduated lines that represent 2 centimeters each at 300meters distance.

The sight line distance is 760mm.

(Pages 2-3)


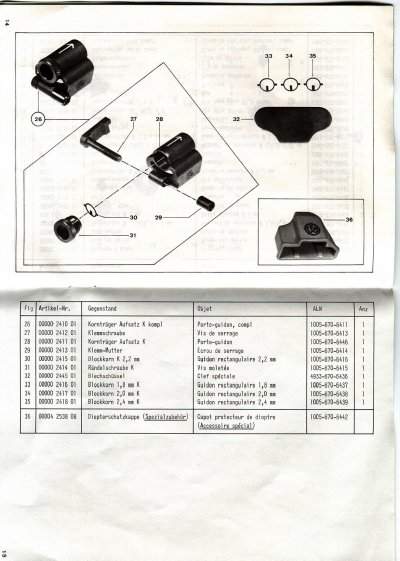
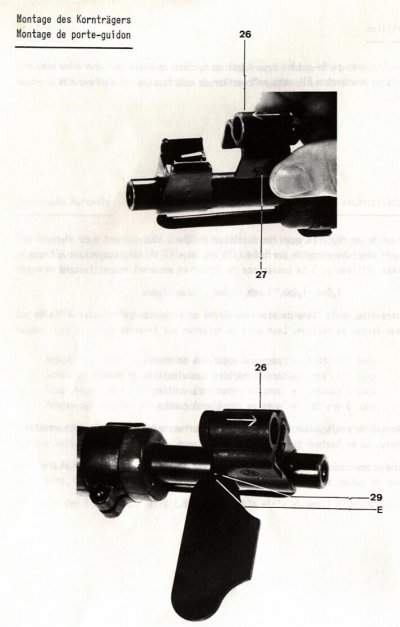
Mounting the front sight;
-back off the mounting bolt (27) until the threads are no longer visible.
-with arrow (26) pointing towards target, slide the front sight assy. over the rifle's fixed sight until it seats
-firmly press down on the front sight barrel while while tightening the set screw (29).
- check for play in all directions (there should be none).

(Pages 4-5)


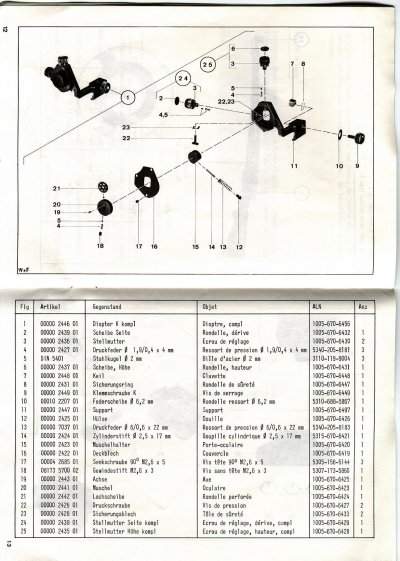
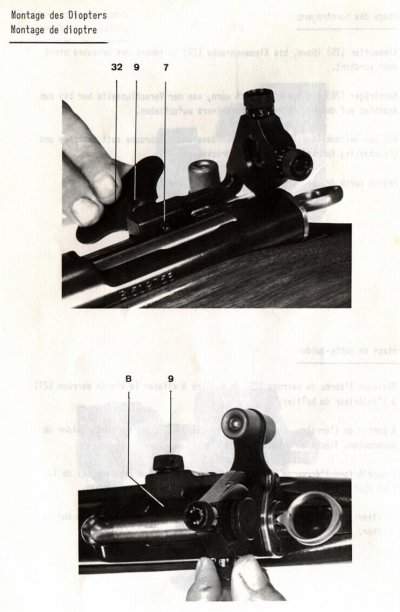
Mounting the diopter (rear sight);
-Unscrew (without forcing) the knurled mounting screw (9).
-using your left hand, set the diopter assembly in place onto the receiver with the forward leg (7) set on the wide part of the ejection port (8)and the eyepiece just on top of the rear of the receiver.
-hand tighten to set screw, then finish tightening with the factory tool.
-hand check for play in all directions (there should be none).

(Pages 6-7)


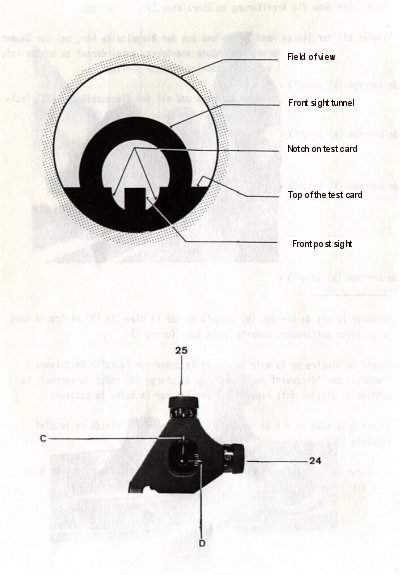
Adjusting the line of sight;
-Once in place on the receiver, make sure that the eyepiece is centered in windage (24) and elevation (25) by looking at the long white reference lines (C&D) (opposite of the side you aim through).
-next, set your factory front sight in position 10, representing 1000 meters. Now look through the diopter and line everything up on the target. The sight picture should be perfectly concentric and tangent.

(Pages 8-9)


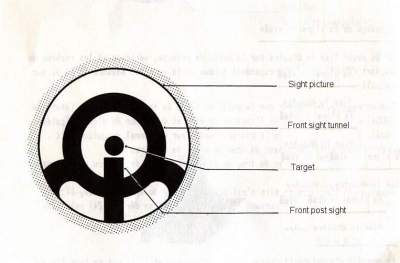
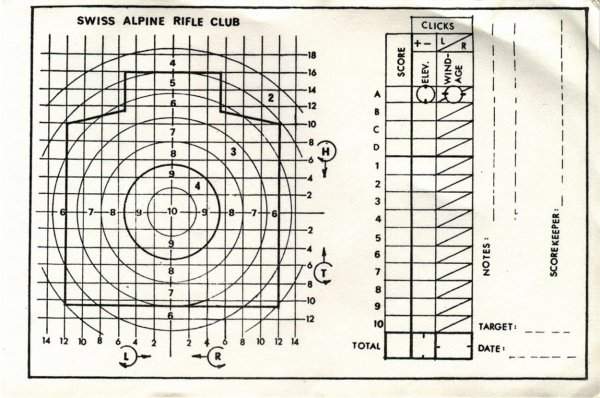
Aiming process:

Align the front tunnel and rear tunnel to give a concentric sight picture, where the target appears just above the front sight post.


(Page 10)


(Page 11)


(Pages 12-13)


(Pages 14-15)


Shooter's card

To see the original click here


Acknowledgements:  Thanks to Vaudois for the translation, and thanks to Carlos for the scans.

To return to the Schmidt-Rubin Aftermarket Sight page click here